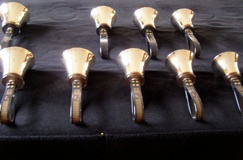
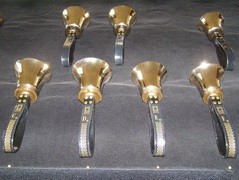
A reader asked me to elaborate on how I use the pins mentioned in the gadget box section of the Concert equipment article. This started me thinking about the whole topic of table landmarks. With many other instruments, the pitch position is fixed (like a piano keyboard or harp strings) and the musician stays anchored to a bench or chair. Handbell soloists move along the table; the bells move around the table. We need all the help we can get keeping track of our instrument. Enter the pins.
I put a pin at each break in the foam, at the edge of the table nearest me. I stick it right through the cover into the foam (or the space between the pads). Then I organize my bells on the table like this: B4 to F5, pin (foam break), G5 to F6, pin (with F6 right on the foam break), then G6 to G7. The pin marks the join in the foam, which you may want to avoid if it isn’t completely level, which sometimes happens. It becomes a landmark for damping bells, and makes it easier to reset the table during practice. I can herd bells into the correct section of the table, then reset for the next piece. Once a piece is ready to perform, I work on resetting each bell exactly where it belongs, not just in the vicinity, but the pins are still helpful as landmarks.
My solo table setup evolved like this. I started with the bells far enough apart that I wouldn’t clash castings. Though I don’t remember exactly, I probably had a two octave range (C5 to C7) spread out on the whole 9 foot table. I gradually moved the bells closer together, so now there’s room for the range B4 to G7. This took the better part of a year, and now (knock on wood) I rarely clash castings.
Over time, I developed a spatial sense of where certain bells are, without always having to look at the handles. In that respect, it’s like a pianist learning intervals with fingers on the keys. I try to avoid shifting the keyboard setup on the table, though I do play one piece for which I shift all the bells up an octave (so I can accommodate the large bells from D4 to A4). I want to know what each bell is with just a glance, which is easier if the bells always have the same home position. By allowing room for B4 (instead of C5) as the lowest bell, I have space at the low end of the table for different large bells as needed, without disrupting the setup from E5 up. Keeping the keyboard stable makes it much more comfortable to displace individual bells within that framework.
I’ve also used pins to mark every handle in a range, while working on some pieces. One common problem in solo ringing is figuring out where to damp a given bell while holding several adjacent bells. If you put the bell in the wrong place, you’ll crowd other bells you set down later. Generally, you can use sharps and flats as markers (for example, you know C6 goes in the space under C#6 and D#6.) But what if you have those sharps in your hands as well, or they’ve been displaced? By marking each handle’s location with a pin at the edge of the table, you develop a sense of where each missing bell belongs.
You can mark every position, or just certain notes (like the colored strings on a harp marking C and F). By the time a piece is ready for performance, you may not need the pins. Even if you do, they aren’t visible to the audience. You can even mark the base of sharps and flats if you need to, though then you have to take care not to catch them in a casting while lifting or tabling a bell in the row closest to you.
The pins came in handy once when I performed at a church with a wall made of glass. The sun glaring through that window during warm-up made it hard to read the handles, especially at an angle. In one part of the music, I needed to make an octave jump, and I was afraid I would pick up the wrong bell. I marked that bell with a pin, in addition to my usual pins, and had no trouble finding the bell when I needed it.
I use quilting pins with a round colored head, and store them in a Tic-Tac case. You could use T-pins, or any pin with a prominent head.
There are landmarks besides pins, of course. I sometimes remove all bells beyond the top of the range, so I can easily locate the top bell and the one just below it. That’s especially helpful on jumps. If you have mallets on the table, it’s good practice to put them in a consistent place so they’re easy to find, and they become a landmark as well. Chimes, bells on end, large bells displaced to the treble end of the table, the ends of the table itself: all of these become part of your visual sense of the table, and of where other bells are in relation to them. These landmarks become a useful tool, if they remain consistent for a given piece.
Some months ago, I realized that one of the challenges of moving from my practice space to a performance venue was that I had developed a spatial sense of the bells not just in relation to each other, but to visual landmarks in my living room (like the edge of a window). In the venue, I do drills to readjust to the sightlines (and get used to the acoustics). I’ve recently added a step to my concert preparation. Several days before the concert, I start using the far side of the table, so I’m facing the opposite direction. Of course, that means moving all the bells so I still see the same keyboard setup. When I look up, though, I see the bookcase that’s normally behind me, and I have to rely on the visual landmarks of the table alone. It’s disorienting (both visually and acoustically), and exposes any uncertainties in the music. Better to do that several days before the concert and work out all the bugs. By the time I get to the venue, I’ve stopped relying on the sightlines in my living room.
Soloists also develop a vertical sense of the table. My tables are adjustable height, and I settled on a particular height after some experimentation early in my solo work. This allows me to use the entire length of each note for my ringing stroke. (It also helps when making table skirts.) If the table height were to change, my timing would be thrown off, and I would have to adjust the size or height of all my bell strokes to compensate and end each note at the right time. I used to warm up wearing the same sneakers or walking shoes I wear during setup. I realized that was causing timing problems, so I switched to the ballet slippers I wear to perform, which are about the same height as what I wear during practice. Even that half inch of extra sole on the sneakers mattered. If you use tables provided by the venue, I suggest carrying some method of raising the tables (like blocks, in various increments) or extra foam to bring the surface to your accustomed height, as well as a tape measure to check it.
Copyright © 2012 Nancy Kirkner, handbells.com

